Upgrading software using USB "upgrade" stick
This instruction sheet describes how to upgrade diagnostic software using the preconfigured USB upgrade stick.
These instructions ONLY apply to these diagnostic tool families:
| ● | ZEUS® |
| ● | VERUS® Edge |
Before You Begin
Have the following items on hand:
| ● | USB upgrade stick |
| ● | Diagnostic tool with a fully charged battery pack |
| ● | The AC power supply |
I It is highly recommended that the diagnostic tool be powered by the AC power supply during the upgrade procedure, to avoid accidental power loss, which can severely damage the software, and or diagnostic tool.
The USB upgrade stick is designed to be used with one diagnostic tool only. Once the software upgrade is installed on the diagnostic tool, the USB upgrade stick cannot be used on any other tools.
Upgrading Diagnostic Software
| 1. | Connect the AC power supply to the diagnostic tool, and to a live AC electrical power source. |
| 2. | Turn the diagnostic tool on. |
| 3. | After startup, exit the ShopStream Software Suite (diagnostic software), and all other open programs. The Windows desktop displays. |
| 4. | Insert the USB upgrade stick into a USB jack on the diagnostic tool. |
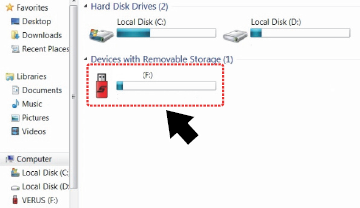
| 5. | The upgrade process should automatically start, if not, remove and reinsert the USB device. If the upgrade process still does not start: |
| ● | a. Select the My Computer or This PC icon from the desktop. |
| ● | b. Select the USB upgrade stick . |
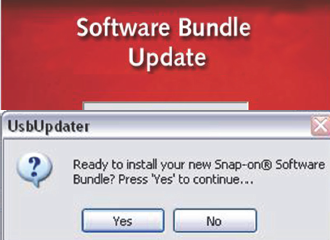
| 6. | The Software Bundle Update installation screen will be displayed. Select YES when asked “Ready to install your new Snap-on Software Bundle?” . |
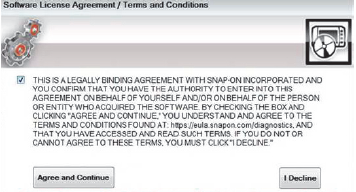
| 7. | The software license agreement displays. Read the agreement, and check the box, then select "Agree and Continue". |
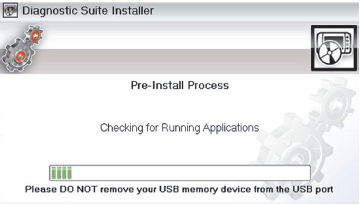
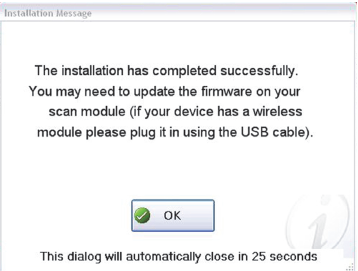
The Diagnostic Suite Installer screen opens, and a series of screens are displayed to show the progress.
Once the installation is complete a confirmation message is displayed.
| 8. | Select OK to continue. |
| 9. | If the message “There is an update available for your scanner” appears, proceed to the next section Scan Module Firmware Update. If this message is not displayed, the upgrade is complete, no further action is required, and the diagnostic tool is ready to use. |

If no action is taken, the firmware update will automatically start after ten seconds.
| ● | Selecting Update Now begins the process immediately. |
| ● | Selecting Update Later defers the process to a later time, closes the message, and starts the Scanner function. |
Scan Module Firmware Update
| 1. | Connect the AC power supply to the diagnostic tool, and disconnect the scan module from the vehicle. |
When performing a firmware update it is recommended to disconnect the CSM from the vehicle (if connected) and use the supplied USB cable to connect the CSM to the diagnostic tool. Using the USB cable provides power direct from the diagnostic tool to the CSM, and allows for faster updates. Leaving the CSM connected to the vehicle DLC during a firmware update will work, however may take longer than if connected by USB. Also, if vehicle power to the DLC is interrupted, of the diagnostic tool looses communication with the CSM, the CSM may not update correctly and/or be damaged.
The scan module must be powered on to perform the update process. The diagnostic tool must be connected and powered by the AC power supply during the CSM firmware update process. Damage can occur to the CSM if the diagnostic tool power is turned off, the power supply is disconnected, or the diagnostic tool looses communication (out of range) with the CSM during the firmware update process.
| 2. | Provide power to the scan module, using a USB cable connected from the scan module to the diagnostic tool. |
When connected, the scan module USB connection status icon will change.
| 3. | From the Home screen, select Scanner. |
| 4. | Select Update Now when the update available message displays. |
The update begins and installation progress is tracked on the screen.

The message “The Scanner Module has been successfully updated.” displays after the installation is complete.
| 5. | Select OK to close the message, and return to the Scanner function. |
The scan module, now has the latest firmware update and is ready to use.


